Tuesday, November 17, 2009

Install the AVG upgrade, and do it right!

Many of my customers use AVG Free for their anti-virus needs. If you use AVG as well, you should be seeing a strange pop-up saying you should upgrade.
Don't worry, this is legit, and you still won't have to pay for award winning anti-virus protection.

If you don't have this pop-up and want to UPGRADE, you can download it HERE. Then skip down to the install instructions below.

First, click on the big, red, "LEARN MORE AND UPGRADE NOW" button.

A new internet window should open and should look like this:

 HERE IS THE TRICK: You should scroll down the window and find at the bottom of the page the "Update my current product only" Link.
Click on the link and a new window will appear like this:

Scroll down the AVG anti-virus free column and click the download link.

Installation

Your computer should ask you if you want to run/open or save the program. You want to run or open it. If not, save it, and then run the program.


The following window should pop-up:

Click Next and a new window will follow:

Click "Install only basic free protection.", click next and a new window will appear:

Once the download is complete you will get:

Click the "I have read the licence agreement" and click accept.

Next, click Custom Installation and then click next.

Make sure the check boxes are checked and unchecked as shown above!


The program will continue to install:

Once completed, it will ask you how you would like to set up your scanning schedule. I recommend selecting "never." But why?!? Am I crazy? No, I just like to have control over when my computer starts scanning. If you feel the need to scan, do you when you'd like. AVG is always on in the background guarding your system, so you're protected!


AVG will ask you if you are sure, click yes.

Now a new window appears. UNCHECK "I agree to provide..." box, unless you would like AVG to receive info about viruses your computer found during scans.

Click Finish, and now it is time to restart your computer. Save any work that you may have also been doing, and restart your computer.

When you reboot your computer, you may get a pop-up that asks if you would like to "Optimize" your scan. Allow it to do so. It may take an hour to complete, and it shouldn't slow your computer down so you can do other things.

This tutorial should be a good guideline for future AVG upgrades. They happen about once a year.

Welcome to AVG 9 FREE!

Tuesday, June 9, 2009

Computer Repair Wisdom - IP address with No Internet

Through PC-Mat.com, I repair computers and electronics all - the - time. And even though I have been doing it for 10+ years, I seem to forget one of the most useful things I learned years ago.

When repairing computers, it is not always what you have, but the order in which you install it.

Here is a recent example:

I sometimes encounter strange errors after copying a customer's hard drive to a new, larger drive. This time I had an IP address, good DNS, can ping other network computers, but no Internet. I did all the usual fixes: Winsock2, lsp, NodeType: Hybrid, reinstall the driver, reinstall XP sp3, install IE8, sfc /scannow, netsh stuff and I'm sure more... all with no result.
So I was thinking about reinstalling XP... aaaaghhhhh... I HATE doing a reinstall...
Then, after watching Hancock thru Netflix instant streaming... I thought, "Oh yes... why don't I uninstall it from the system."
I used this method of troubleshooting as my first step for many years... before I knew "too much."
So I went to Device Manager, found the Broadcom network controller, right clicked on it, hit uninstall, and rebooted.
The computer booted up, found the "new" hardware device, and connected me right to the Internet... aaaaaaahhhh peanuts.... 6 hours of being "hardcore", and all I had to do was reinstall the device AFTER my OS reinstallation.

So what's the moral of the story?

It's not what you have, but the order in which you have it.

I'm sure there is some grand life meaning to that too, but more importantly it would have saved me about 6 hours of frustration...

Tuesday, May 26, 2009

Vista Service Pack 2, just what we need.

It turns out that Microsoft has just release Service Pack 2 (SP2) for Vista. Sure we didn't notice much after the first service pack, but this is the one we have been waiting for.

I have had NO problems with the update and I have seen a noticable improvment in Vista's performance!

You can get it HERE or download it through Windows Update.

Here is the list of fixes and upgrades:

-Slow shutdowns mostly resolved (we'll see)
-Wi-Fi dissconnect probelm resolved when started from sleep mode
-Blu-ray discs recording support
-Bluetooth v2.1 supported updated
-Vista Sidebar performance improved
-Power management efficiency increased by "10%"
-Support for VIA Technologies' new 64-bit CPU
-exFAT support
-Fixes almost "700" other nagging Vista issues! (Says Microsoft)

For more info visit the source HERE.

Sunday, May 24, 2009

Turn Vista into a Total Home Theater - The Easy Way!

Have you ever just wanted to sit back and watch some DVDs without getting out the whole stack of DVDs you have piled somewhere around the house? Wouldn't you like to fire up a device and choose from all your DVDs with just your remote? How would it sound if you could choose a movie from a list of 12,000? How about watching your favorite T.V. show you missed? We can do all that, and set up only takes a few minutes!

We are assuming you have the following:
1) A PC with Microsoft Vista
2) An Internet Connection with a Netflix account
3) A DVD drive and/or a Blu-ray drive with Blu-ray player software

What we will get with this easy made media theater:
1) Netflix - Stream 12,000+ movies
2) Hulu - Stream television shows and movies that you love
3) Personal Video Collection - Store and play all your DVDs, Blu-rays and home videos

Windows Vista comes with Windows Media Player (VMC). We will use this as the foundation to make our quick and easy media theater. To access the VMC, click on the start button and type "media center" into the search bar and push enter.


1) Netflix

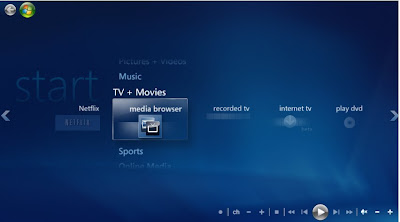
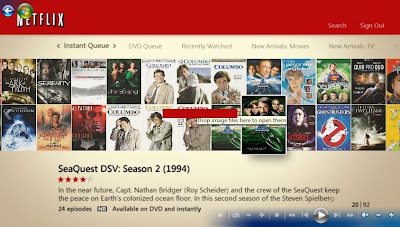
Microsoft just released a VMC update that includes Netflix. Once VMC is loaded, you will see a Netflix icon to the left of the recorded tv icon (See Image Above). Click on the icon and enter in the necessary information and you're set. You may have to update your computer because Netflix uses Microsoft Sliverlight, but once that is done, you should be able to watch videos right away!


2) Hulu
There is not an official Hulu streaming program like for Netflix, so we will have to try a couple of different programs. Each program will work for both 32 and 64 bit versions of Vista.

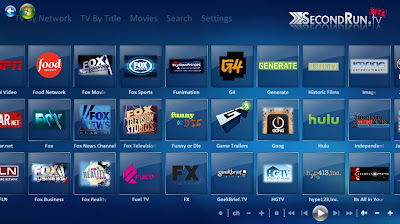
The first program is called Secondrun.tv. This is a good program with a nice interface that separates the videos by channels. You can download the video HERE.


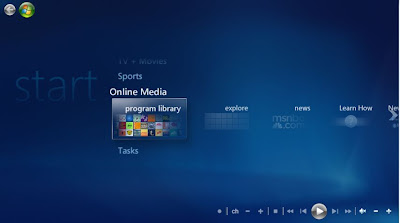
After installing this program, you can run it by going to the "Online Media" section and clicking on the program library icon in VMC and finally on the SR icon.


The second option is called TunerFree MCE. This program provides more than just Hulu, but it's interface isn't as clean as Secondrun.tv's but it does work. You may find it to better suit your entertainment needs. You can download it HERE.

3) Personal Video Collection

I'm sure you'll agree with me that having a case full of DVDs is cumbersome and not ideal. VMC will read DVD files as if it is the actual disk, but how do we get those files to the hard drive?

AnyDVD HD from Slysoft is my first choice. The is not a free program, but since we are also talking about Blu-ray movies, then this is the program to get. You will not find a free Blu-ray program, and AnyDVD HD is a simple and reliable solution. You can download AnyDVD HD HERE and try it for free (since you're there download Virtual Clone Drive as well). Run AnyDVD HD and insert a disk to rip. The tray icon will tell you that it is scanning the disk. Right click on the tray icon and select the Rip to Hard Disk or Rip to Image (.iso) option. But which should you choose?
For simplicity, rip all DVDs and Blu-rays as an image.
Please NOTE:
It is recommended to rip DVDs to Hard Disk than to an image. There are a few reasons for this, but the main one is VMC will "see" the DVD files as a disk and will NOT "see" the image (.iso) files at all under the VMC DVD library. Don't worry, if you do rip all your DVDs as images, we will be able to see our DVDs using another program... Media Browser... but first...

Virtual Clone Drive will load your image files as if you took a DVD from your collection and put it in the DVD drive. The program will act like a new DVD drive for all your virtual disks (image files). So you don't ever have to get a disk out and use up a DVD drive on your computer; it's all virtual. You can download Virtual Clone Drive HERE.

Media Browser (2.0.11.0) is in beta, but it's highly recommended you use this beta and NOT the stable version (Video Browser 1.3.2.0). The two versions are NOTHING alike. You can download Media Browser Here.

IMPORTANT: After you install Media Browser, it will ask you to add your video file locations in the Configuration Wizard. Add your video file locations and then change the location of the Daemon Tools to the Virtual Clone Drive location.
For example: Click Advanced Playback, Change Location and find Daemon.exe at
C:\Program Files\Elaborate Bytes\VirtualCloneDrive\Daemon.exe
Now run Media Broswer by opening VMC and going to program library and selecting the Media Browser icon. It will do an initial set up and the default options will work.

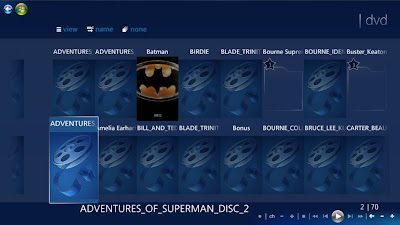
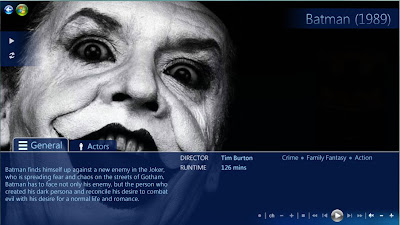
If everything set up correctly you will be able to see all your Blu-ray and DVDs in the Media Browser program and play them right from the menu! How convenient is that!


So in review:

1) Netflix - Built in, just enter in your info.
2) Hulu - Try these two programs:
3) Personal Dvd/Blu-ray Library - Load in this order:
4) Get off the couch once-in-awhile!

Wednesday, May 13, 2009

Turning Your GMail Email Account into Online Storage!

Google's mail service, or GMail, has become a large entity in the free email service department. The days of using Yahoo or Hotmail are almost gone. A majority of my friends have switched over to GMail and deactivated their Hotmail accounts. It's always nice to centralize your online needs in one location and google seems to be good at it. However, who do you know has actually used up all that email storage space that GMail offers? Currently I am using .025 GB out of 7.3 GB of email storage space. That is essentially a 7 GB flash drive begging to be used!

Though this is NOT an official Google program, it is extremely handy when you need your files on the go, wherever you go (online).

So here is how you use your space:

I was going to have some nice pictures showing exactly how to do this, but it is really an easy install!

1) Create a new email account for your online GMail hard drive.
Example: your-regular-email-name-and.drive@gmail.com

2) Download (Save) the program here: DOWNLOAD

3) Unzip and run the program. You may have to reboot your machine.

4) Go to My Computer and Open your GMail drive.

5) Enter your user name, password and check auto log in. You can always change that later.

6) Now drag and drop a file and watch your new online hard drive take action like action has never been taken before!... <---- What? Congratulations! You can now use your 7 GB of online storage space! This is great for group work projects or even for files that you just have to have anywhere you go (with Internet of course)!

Here are some words of caution before you journey into this dark and wondrous forest:

1) Though gmailfs may work now, GMail may disable this feature in the future. You can always download your files as attachments from your GMail account if needed. Before you do all that troublesome pointing and clicking, look for a new version of gmailfs online; they may have fixed the problem.

2) Try not to put personal files that can be used for identity theft on your GMail Drive.

3) Always copy the file from your GMail Drive before editing them! If you do not, you may lose the file in your Temp folder... never to be seen again...

4) Your file size limit is about 10 MB (similar to attachments), but it can vary.

5) Do NOT make folders in folders in folders! You can't make your file directory structure too large! One MAYBE two folders within a folder is as far as you want to go, otherwise it won't work.

6) You cannot Rename your files from the GMail Drive, but you can do "everything else."

You have been warned!!! Woo ha ha!

Enjoy!